本质上,webpack 是一个现代 JavaScript 应用程序的静态模块打包器(module bundler)。当 webpack 处理应用程序时,它会递归地构建一个依赖关系图(dependency graph),其中包含应用程序需要的每个模块,然后将所有这些模块打包成一个或多个 bundle。
npm初始化项目
~\Desktop\hello [13:24]
❯ npm init
This utility will walk you through creating a package.json file.
It only covers the most common items, and tries to guess sensible defaults.
See `npm help json` for definitive documentation on these fields
and exactly what they do.
Use `npm install <pkg>` afterwards to install a package and
save it as a dependency in the package.json file.
Press ^C at any time to quit.
package name: (hello)
version: (1.0.0)
description: a webpack init project
entry point: (index.js)
test command:
git repository:
keywords:
author: nicolana
license: (ISC)
About to write to C:\Users\juniv\Desktop\hello\package.json:
{
"name": "hello",
"version": "1.0.0",
"description": "a webpack init project",
"main": "index.js",
"scripts": {
"test": "echo \"Error: no test specified\" && exit 1"
},
"author": "nicolana",
"license": "ISC"
}
Is this OK? (yes) yes安装webpack
npm install webpck webpack-cli --save-devwebpack 4+ 版本,没有集成 CLI,所以需要单独安装
目录及文件结构配置

新建一个src目录存放我们的源代码
新建一个webpack.config.js 存放我们的webpack配置
代码编写
src/index.js
function component() {
  var element = document.createElement('div');

  // Lodash(目前通过一个 script 脚本引入)对于执行这一行是必需的
  element.innerHTML = _.join(['Hello', 'webpack'], ' ');

  return element;
}

document.body.appendChild(component());
接着你其实就可以直接对他打包了
npx webpack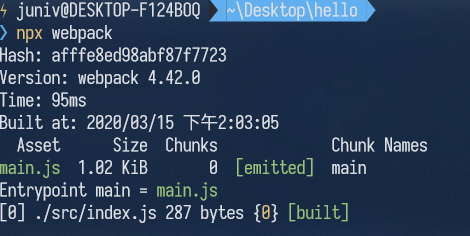
src目录下的index.js 文件就会被打包进dist/main.js文件中,也就是Entrypoint指向的文件,也叫入口文件
接下来,在根目录下的index.html中引入代码即可执行里面的js
index.html
<!doctype html>
<html>
  <head>
    <title>起步</title>
  </head>
  <body>
    <script src="./dist/main.js"></script>
  </body>
</html>
在index.html中引入 main.js然后打开即可看到
Hello webpack
打包配置
想要自定义入口文件、输出地址及输出名称等等就需要自定义wepack.config.js 了
webpack.config.js
const path = require('path');

module.exports = {
  entry: './src/index.js',
  output: {
    filename: 'bundle.js',
    path: path.resolve(__dirname, 'dist')
  }
};
这里,我们将src目录下的index.js文件打包到dist文件夹下的bundle.js中
然后将打包命令写在package.json中,从而便可以通过简单的命令获得添加很多参数的效果
package.json
  "scripts": {
    "test": "echo \"Error: no test specified\" && exit 1",
    "build": "webpack --config webpack.config.js --progress --colors"
  },
此处我配置了一个build命令:
- –progress 可以显示打包进度
- –colors 可以彩色打印输出
- 其他配置外请访问webpack官网
然后,打包
npm run build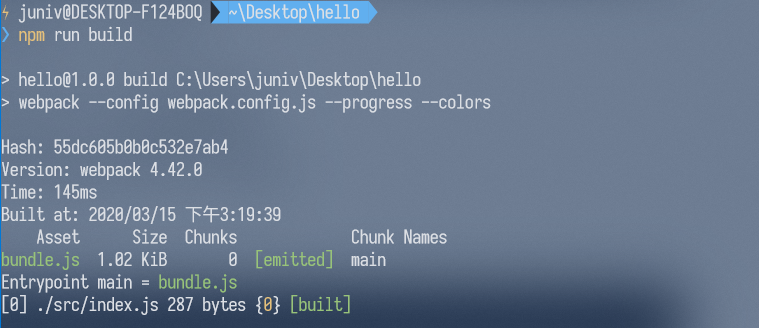
吐槽一下自己,其实我没看出来这有啥区别hhhh
完结


暂无评论